REAPER 101 is a series of short tutorials to help you with setting up and using REAPER.
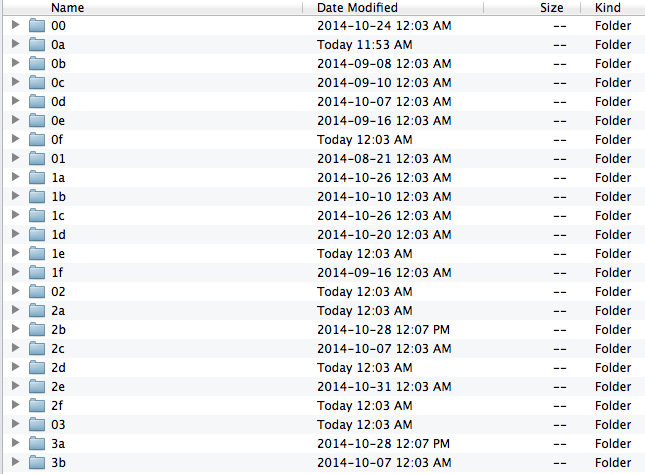
What the heck are peak files and why are they everywhere since installing REAPER? Reapeaks files are tiny image files REAPER uses to give us the waveform displays. There is a REAPEAK file for ever audio file in the project. These might also appear in your sample library as you browse for files from the media explorer. I’ve found the best way to manage these files is not to ignore them but to put them all in one folder.
This tutorial will show you how to set up the alternate peak cache folder.
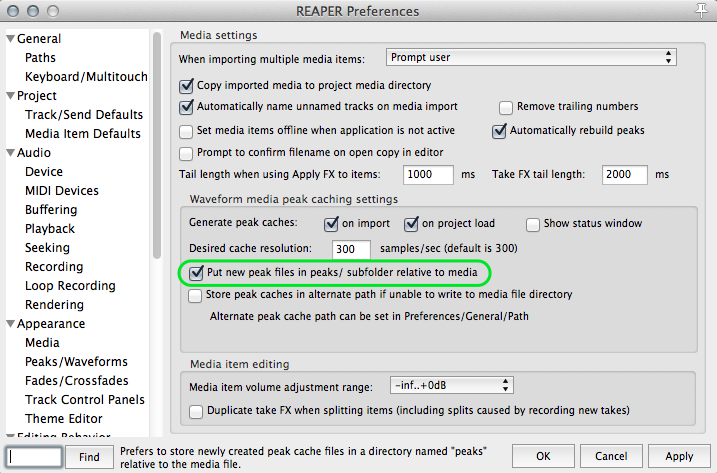
- Open up the preferences page and get to General>Paths. The 3rd text box allows you to choose where to save reapeak files.
- The folder you select could be anywhere, I like to keep them in a temporary folder on the desktop.
- Just one more thing to make this work. Jump down to the Media preferences and click the checkbox for “Store all peak caches in alternate path”


Guess what! You can actually delete these peak files whenever you want, REAPER will just create them again as needed and it only takes a few seconds for most projects. Peaks files can take up a lot of space if you don’t keep an eye on them, now that they’re all in one place it’s easy. Use a scripting tool to automate the process so you never need to think about it. There’s an article here on setting it up on OSX.
So what about all the old peak files littered all over your hard drive? You can delete them. Simply search for “.reapeaks” in Finder or Explorer, select all and move to trash. The files aren’t hidden so a basic search should catch them all.
Update –
Version 4.59 update added an option to make a peak folder beside your media items for the project. If you do not want to keep peak files in the temp directory explained above, simply check this option in the preferences.
Leave a Reply