Editors note – This guest post comes from Tiki Horea (@tiki_producer). I’ve seen he’s a big fan and supporter of Airwindows plugins so I asked him to share some info on a few of his favorites along with tips and audio examples.
Airwindows is one of those unicorn plugin makers that strives to serve the customers, without trying to squeeze every penny out of them. Since August 2016, the company is funded entirely by donations via Patreon.
Check out the Patreon page to see why it’s worth supporting.
All Airwindows plugins are aesthetically challenged. And that’s okay.
Chris “Mr Airwindows” Johnson decided to not waste code and time on fancy GUIs…or any GUIs, for that matter.
That’d be more time spent on debugging the interface, rather than doing R&D or improving on his already existing plugins.
There are no meters on these plugins, so you’re forced to use your ears when making decisions.
I’ve got an ever-growing spreadsheet cataloguing the Airwindows plugins. There’s also a comments section, where I provide more details on using these tools. If you have any tips or tricks, let me know and I’ll add them to the list.
Additionally, I’m running an Airwindows Audiophiles Facebook group. Chris is in there too, answering questions and interacting with users.
A word or two about the audio samples:
– The track I used is Joe Gilder’s Someone to blame. There’s more info on him at the end of the article.
– There is no processing on any of the tracks; I’ve only balanced them.
– All the samples have been loudness matched, including the null results.
On to the plugins, shall we?
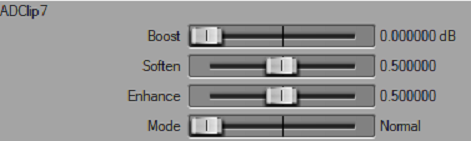
ADClip 7
ADClip 7 is an incredibly transparent loudness maximizer.
It has 3 “output modes”: Normal, Attenuated and Clips Only.
“Normal” is the expected output.
“Attenuated” matches the output gain to the input one, so you only hear the effects of what you’re doing processing-wise, without the added distraction of an increase in volume.
“Clips only” does what says on the tin: you only hear the clipping, so you can decide how loud you make your master (hint: don’t make it too loud, as it’s pointless).
Console4
Console4 is a console emulation plugin package for your DAW, with a catch: there’s no tone shaping to it. This tool provides more internal space, more depth, and it has “glue”, making the top-end more listenable
Depending on the tracks themselves, it can make more or less of a difference. The song I decided to use as an example doesn’t hugely reflect the power of this package, but it’s an improvement nonetheless.
There are a few things to consider when using Console4:
– Do not hit it hard; tracks at -35lufs each could still be too loud for it if it’s a 50+ tracks session. Normalize them, aiming for -50lufs, then use a gain trim in the monitoring chain or on the master buss to make-up for the lost volume to help when mixing.
– Don’t use any plugins after Console4Channel, nor before Console4Bus as this changes what they’re doing and won’t be able to work properly.
– Console4 eats up low end sometimes. If you do use it on low-end-rich tracks, also send them to an auxiliary track with Fathom Five on it, to help recover the low end.
If the newly-added low end distorts,
- Create a mix buss with Console4Buss for everything but the Fathom Five track.
- Send both the mix buss and the Fathom Five track to the ‘master buss’
- Process your master buss as usual.
What you’re hearing in this example is: Raw balance, Console4, Null test result.
Note: the null test result of using Console4 only results in some heavy transient peaks, so I decided to use a clipper/limiter on that one. Only those peaks were affected, nothing else.
BussColors4
BussColors4 is yet ANOTHER console emulation. What’s special about this one is that it more closely emulates consoles since it’s based on NoiseVault’s impulse responses from all these different consoles.
He made the IRs with the consoles at different levels. Over the years, Chris improved the algorithms he made from the IRs to bring them to where they are now.
This plugin sounds BETTER at 96k and 192k than it does at 44.1k. Cool, eh?
As described by the developer, the different settings are:
Dark – MCI (unusual midrange articulation, solid sound when pushed)
Rock – SSL (tightens bass; more character added using the input trim)
Lush – Neve (more bass; pillowy and fat, with airy highs and large in scale)
Vibe – funky old console (could bring an old dub platter sound to a track)
Holo – Focusrite (3D space; locations of sound sources take on a special holographic quality)
Punch – API (loaded with punch and impact)
Steel – special effects console (lacks bass, old reggae consoles, it could accentuate the personality of some electronic music; cleans up low mid mud)
Tube – Manley (luminous, airy)
See more details on the different settings here http://www.airwindows.com/busscolors3/
The audio examples for BussColors4 have the plugin at default settings.
I decided not to overload the article with samples for all the different flavors the plugin offers, but the files are available at the download link below.
One set of samples has the plugin on all the tracks of the mix, including the busses and the mix buss.
The second set has the plugin only on the busses and the mix buss; the individual tracks are not processed at all.
What you’re hearing in this example is: Raw, Dark on busses, Null test result
What you’re hearing in this example is: Raw, Dark on busses, Dark on all channels, Null test result for Raw and ‘all channels’
What you’re hearing in this example is: Raw, Holo on busses, Null test result
What you’re hearing in this example is: Raw, Holo on busses, Holo on all channels, Null test result for Raw and ‘all channels’
What you’re hearing in this example is: Raw, Tube on busses, Null test result
What you’re hearing in this example is: Raw, Tube on busses, Tube on all channels, Null test result for Raw and ‘all channels’
PurestDrive
PurestDrive is a virtually transparent clipper.
I recently realized I’m obsessed with it, probably because I haven’t been able to use it for over 6 months.
At the moment of writing this article, it’s still macOS only. Since I’ve been on a Windows machine for more than half a year, I was unable to cheat my way through mixes using the object of my obsession.
During my limited testing of this beast, I noticed that if you keep it under 75%, no harmonic distortion takes place.
Joe Gilder from Home Studio Corner allowed me to use one of his tracks for this article. Check him out at homestudiocorner.com, on YouTube and Twitter @joegildermusic.
Jon “Not Kenny” Tidey (he says he’s done with the joke, but I’m not) gave me a platform to rave about Airwindows.
The guy works really hard for The REAPER Blog, with very little financial gain from it.
Support him on Patreon. Seriously. If you’re reading this, do it right now.
…
Thank you, reader. You’re great!
Leave a Reply