REAPER 201 is a series of articles for intermediate users to accomplish specific production tasks.
This tutorial will explain how to easily tame or remove excessive p-popping on a dialog track using an Equalizer and item FX.
Removing vocal plosives
Often while working with voice recordings, you come across “plosives”, short puffs of air that causes the microphone to distort. Pop-filters and windscreens help to reduce the issue at the source but this isn’t always enough and they’ll need to be removed in post-production.
In REAPER this is a quick and easy task to accomplish thanks to item FX.
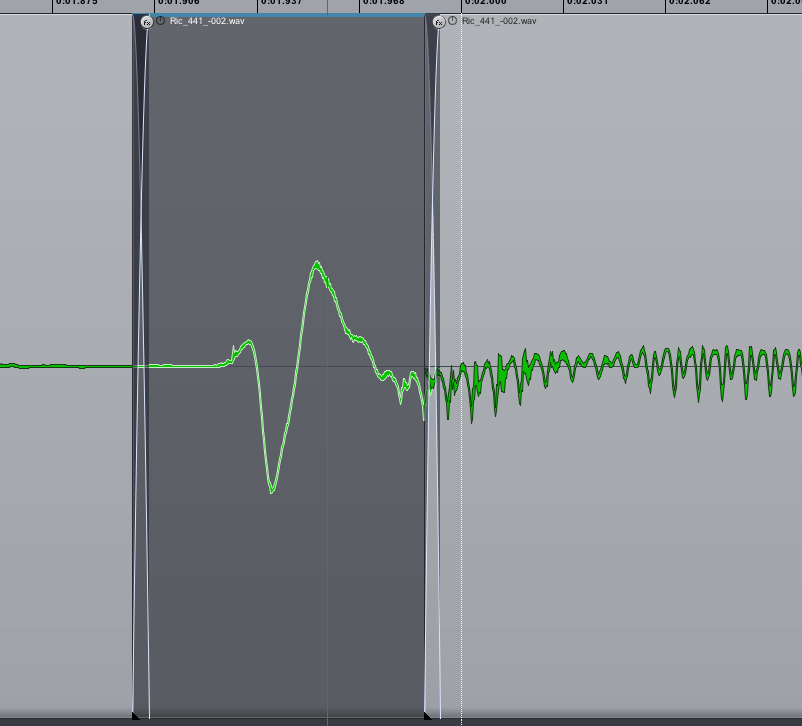
Here is a short clip of some dialog. There are two P’s in the phrase and the first one puffs into the mic too much.

Pops are easily identifiable in an audio waveform. Split the item before and after the plosive. Make sure aut0-crossfades are active. Don’t select much more than the spiky part.

If the Item FX buttons are not visible, navigate to the Appearance/Media preferences to activate.

Click the item FX button for the isolated plosive and insert ReaEQ.
Set band 1 to High Pass type and Frequency to 140Hz. This is a good starting point.
Save this as an FX Chain named “Remove Pop”.

Now, whenever a pop appears in an item, just make two quick cuts, right-click the FX button and select the ‘remove pops’ chain. Done in about 3 seconds.

Here’s the dialog after fixing the pop and how the waveform appears if glued.

Comments
6 responses to “REAPER 201: Removing vocal plosives”
RT @reaperblog: New Post: REAPER 201: Removing vocal plosives – http://t.co/naWkUjDz
For some reason FX chains was something I hadn’t really used before. Nice feature. I’ll be using it more often.
Refinement to make your tip even quicker. You can alt+right-click (in Windows) to drag select over an item to select the item and make a time selection in one stroke. Then simply press shift+S to make a split point at both ends of the selection.
Another way is calling a track template (set as child of vocal items track) with EQ already set and moving all pop items in that new track. Maybe even faster, and only one plugin instance is used.
Each method has its own benefits and drawbacks. Just wanted to add this alternative 🙂
THANK YOU. CLASS THAT WAS GREAT HELP.
Copy (not move) all sliced instances of plosives or sssssses to a new track, set volume to the same value as source track, revers phase on new track. You should not hear those plosives at all now. Then reduce volume to moment when the problematic sounds cancel each other slightly enough to make you happy.
No FX needed.
In advanced case you need to ‘cancel-out’ selected frequencies only – use linear phase eq.
Excellent Tut , very useful, thx !