If you do a lot of collaboration with users of other DAWs, or a lot of mixing for other people, you’ll run into split stereo files pretty often. This article shows two ways to combine 2 mono files on separate tracks into a stereo file on one track. Both methods use basic REAPER functions so you do not need to use a separate program or create custom actions.
What is split stereo?
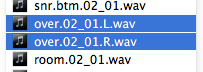
A split stereo file is a non-interleaved simultaneous recording that has the left and right channels in separate files. You can easily spot this in the filenames with “.L.wav” or “.R.wav” at the end.

There’s nothing wrong with files like this, sometimes you prefer to have the Left and Right files combined on one track.
True stereo or duplicate mono?
Before you do anything, check that the two files are indeed a stereo pair. Click the mono button on the master, then invert the polarity of one of the split stereo files. If the sound completely disappears, you know the audio is the exact same on both files. It’s very common that the same exact signal is on both files, you can just delete one of the files in that case.

Workflow 1 – Folders
The most straightforward option is to pan the two tracks opposite, group the items and then turn an empty track above them into a folder.

The benefit of this method is you can still apply processing to the left and right channels separately. The downside is that now instead of 2 tracks there are 3, which is 2 more than we wanted.
At this point you could then RT-Click on the folder track, go down to the Render/Freeze option and select “Render Tracks To Stereo Stem Tracks (and mute originals)”.

Which now creates another track but with a stereo audio file on it. You can delete the previous 3 tracks.
Workflow 2 – Free Item Positioning
This method puts the two items on one track in lanes and both will play simultaneously.
Make a new track and drag the Left channel file onto it.
Enable “Free Item Positioning” for this track.
Shrink the height of the item a bit, then drag the Right channel file onto it.

Then you just need to use the pan control in Item Properties (a double-click on the item should take you there).

That’s it. There are probably other ways but these are the two methods I use most often. Once you learn these methods you can accomplish the task in about 10 seconds.
EDIT 02.01.2013
I recently found a third option which works very well. If you have SWS Extensions installed you can use the “Implode items to takes and pan symmetrically” action.
Comments
5 responses to “Working with split stereo audio in REAPER”
Also, if there’s an effect that your really only want to do on one side, you still can with method 2 and per item FX.
@reaperblog Great post on dual mono, is there a way to see instant that the track is mono or stereo on the waveform or only in the meters?
Last solution is awesome 🙂
The last solution is awesome – but if the two items were previously grouped and I could tweak their stretching via dynamic splits, now when they’re a single track they surprisingly lost the grouping – and I didn’t find a way to add a stretch marker to both at the same time.
Hi there, I’ve got a quick question relating to this (sort of)! To keep this as simple as possible – I am currently composing music for a podcast. The way my system is set up is tracks 1 to 22 are mono tracks and I then mix these as a stereo track from track 23 onwards. I am trying to figure out a way to copy or duplicate the stereo mix back into the session tracks (1 to 22) so I can then edit in the voice over and mix the two together to track 24. The issue I have is when I copy the mixed music track from 23 which is in stereo, to any of the ‘session tracks (1 to 22) it becomes mono. Is there a way of doing this so the music track remains stereo when it’s copied to one of the mono tracks between 1 to 22? I tried selecting ‘stereo source’ in the I/O but the stereo track from 23 remained as mono. Thanks heaps for your help. Richard.