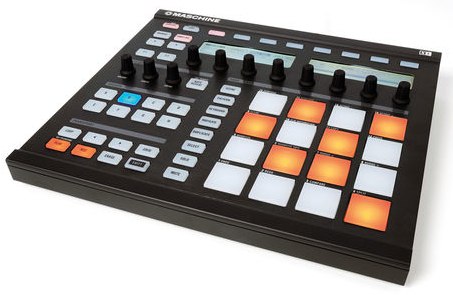
This is a guest post from Chris Caulder, originally posted on the forum. When I came across the tutorial it looked too good not to share. Check out Chris’ YouTube Channel. Big thanks to Chris for sharing this great tutorial.
Maschine as VST in REAPER – FULL TUTORIAL plus Controller mode config
Last weekend I worked hard on getting Maschine to work great as a VST inside REAPER (multi-timbrally), without going into Controller Mode. I’ve since found that it’s actually VERY advantageous to go into Controller Mode with Maschine, once everything is set up properly with REAPER.
This configuration is great if you prefer to use REAPER’s sequencer and do a lot of MPC-style sample chopping and whatnot.. and BONUS— you get REAPER’s Media Explorer, and time-stretched looping. This is the #1 reason I prefer using Maschine as a VST… for sample-chopping (quickly and easily), and tapping these chops out to pre-made loops just to get a song idea going, and fast.
REAPER setup
1. Create 9 tracks in REAPER.
*Make all of their inputs be MIDI: ALL INPUTS, and set each track’s record mode to “Automatic Record-Arm When Track Selected” (right-click the record arm icon).
*Set each of these tracks to “RECORD: OVERDUB” by right-clicking the record arm icon (this is important especially when you’re looping a section and building a pattern).
2. Insert Maschine as a VSTi on track 9.
3. Name track 1 “GROUP A” or “A” or whatever you like.
Name track 2 “GROUP B” or “B” or whatever you like. Repeat for all other tracks and groups.
4. Set track 1’s MIDI input (in REAPER) to “Map Input To Channel” and then select Channel 1.
Do the same for all the other tracks– track 2 will be mapped to Channel 2, track 3 will be mapped to channel 3, etc. (this is an important step).
5. Set Maschine to route each Group to a certain MIDI channel. This is easily done by first dropping a sample (any wav file) onto a single pad in each Group (so the group is active/highlighted). Once this is done, right-click the Group name directly to the left of your Scene view, and choose “Sound MIDI Batch Setup.” Select “Sounds To Midi Notes”.
For Group A (Channel 1), choose Channel 1.
For Group B (Channel 2), choose Channel 2… so on, so forth.
*Maschine looks like it’s doing a global thing with the channels (showing the last channel number you selected, even though you’re on a different group). This is NOT a global setting. It IS changing the midi channel for each group.
Reaper is now set. Now we have to do a lot of configuring in Maschine’s “Controller Editor” software.
———————-
Maschine’s “Controller Editor” software setup
First set the controller sensitivity to Maximum in Maschine’s File menu.
1. Open up the Controller Editor software, and pick a template to use. Rename it to “Maschine in REAPER” or whatever you want.
1a. Set the Pad Velocity Curve to Soft 3 in the Template section of the Control Editor software (Soft 3 is the closest sensitivity to “Maschine Mode” (it’s REALLY close… like, almost exact). This is important!!!
2. Set the midi notes for Group A. You may have to go to the “Pad Pages” section of the Control Editor software, and enable Group A. This is the only group you will use, as you will use other buttons on the Maschine hardware to select your groups (magically, with REAPER!)
3. Set the following pads chromatically in Group A to the following MIDI notes:
pad 1: note C3
pad 2: note C#3 …….. etc.
pad 15: note D4
pad 16: note D#4
Setup REAPER ACTIONS
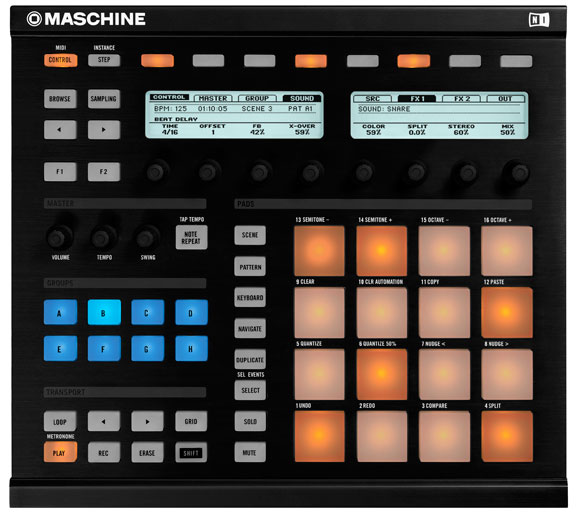
1. Now, see the column of buttons that go from “SCENE” down to “MUTE”, directly to the left of the pads? We’re going to use these 8 buttons to select tracks in REAPER, via MIDI, that match Maschine’s groups. Those buttons have CC assignments… the default assignment shows SCENE is CC 112 (usually). The button below it is PATTERN and that CC assignment should be CC 113… so on, so forth, to the last button in the column (MUTE) which is CC 119.
Go into REAPER’s Actions…. and search for “Track: Select track” – you’ll come across a set of actions for selecting tracks 01 through 08. All you have to do here is ADD a shortcut for each action… for example, Track select 01 would be CC 112 (the SCENE button). Track 02 Select would be CC 113 (the PATTERN button), etc. So, effectively, that column of buttons on Maschine’s hardware will select tracks 01 through 08, thus automatically selecting GROUPS A through H, to play/record (see Step 1 in the first section).
2. Stay in the REAPER Actions window, and find “Transport Play” – ADD a shortcut, using the PLAY button on Maschine (CC 108).
3. Stay in the REAPER Actions window, and find “Transport Record” – ADD a shortcut, using the RECORD button on Maschine (CC 109).\
4. Stay in the REAPER Actions window, and find “UNDO” – ADD a shortcut, using the ERASE button on Maschine (CC 108).
5. Stay in the REAPER Actions window, and find “Repeat” (the function to enable looping on/off in Reaper) – ADD a shortcut, using the GRID button on Maschine (CC 107).
6. Stay in the REAPER Actions window, and find “Transport Rewind” – ADD a shortcut, using the RESTART button on Maschine (CC 104).
Right now, you’ve just set Maschine’s transport buttons to control Reaper, which everyone always wants to do! Yay Reaper.
7. Stay in the REAPER Actions window, and find “Go back one measure” – ADD a shortcut, using the < button on Maschine (CC 105).
8. Stay in the REAPER Actions window, and find “Go forward one measure” – ADD a shortcut, using the > button on Maschine (CC 106).
You can also set the 8 macro knobs on Maschine’s hardware to control the volumes of tracks 1-8.
9. In REAPER Actions window, find “track volume” and make sure you’re on “Set Track Volume for 01” (02, 03, 04, etc). ADD a shortcut, spin the knob you want… and voila, CC 14 (the default CC assignment for Maschine’s 1st marco knob in Maschine’s Control Editor software) becomes the volume knob for track 01 in REAPER (which matches Group A).
Repeat for all other tracks… track 02 would be macro knob 2, etc. etc. etc. The macro knob CCs should be as follows:
knob 1 – CC 14
knob 2 – CC 15….
knob 8 – CC 21
—————————
Now, just build your sounds for each group (using “Maschine Mode” (not Controller Mode)…… what I like to do is load a kit on Group A, and then chop a bunch of stuff for the other groups (B, C, D, E, F, G and H)… oftentimes I don’t even need groups E F G or H.
Now go back into Controller Mode (shift + CONTROL)… and, make sure you’re on Group A (the only Group you assigned)… and to play each of your Maschine groups, you just SELECT THE REAPER TRACK using the following column of buttons:
SCENE (Reaper track 01 / Group A)
PATTERN (Reaper track 02 / Group B)
PAD MODE (REaper track 03 / Group C)
NAVIGATE
DUPLICATE
SELECT
SOLO
MUTE (Reaper track 08 / Group H)
It’s easy, and fast. It’s basically better than using Maschine mode. You’re just using the column of buttons as your Group selection (and in Reaper, track selection) instead of your Group buttons. And you can use the macro knobs for your volume (if you don’t have a Mackie Control or Nanokontrol or whatever).
I don’t have much more time to go into detail (with screenshots or a video)… but I WILL do that, time-permitting. It’s been a very busy week. Just wanted to get you guys started. Also, I will upload a Reaper ProjectTemplate, and I’ll also upload a Maschine Project to reflect all of this. But it’s good to know the steps, as you will know what to do always.
This is the best way to use Maschine as a VST in REAPER and using REAPER’s sequencer to record your MIDI. To make loops and patterns, just highlight the timeline in REAPER, and enable Repeat (looping on/off).
NOTE: I don’t understand how to use REAPER’s Instruments (pianos, etc) in this way, as Maschine handles Instruments in a whole different way. This is just for the drum kit people, or the people who like the MPC-style workflow (chopping samples, etc). If you need a VST instrument such as a synth bass or whatever, just create a new REAPER track and put your favorite VST instrument on it). But this way is great for chopping samples and playing any group you want just by hitting the button that corresponds to that assigned track in REAPER. It’s fast as hell.
A video will definitely make more sense… and I WILL get that done….
Please let me know if you guys have any questions and I’d be happy to help!
Hope this works for you!


Comments
4 responses to “Using Native Instruments Maschine as a VST in REAPER”
Hi Chris – Great article. By following these steps, can I now record vocals using Maschine as the controller? Also, will this let me feed groups from Maschine into Reaper? Thanks.
Hi Chris,
Thank you very much for this very detailed article.
Could you just please tell me how Maschine needs to be plugged to use it as a VST in Reaper ? I usually plugged it with the USB cable and it works until the CC assignments actions.
Thanks and regards.
I get to step #5:
“For Group A (Channel 1), choose Channel 1.
For Group B (Channel 2), choose Channel 2… so on, so forth.”
…and I have no idea what or where these options are. There’s a whole lot of channel selecting going on and I feel like this instruction is quite vague.
I think I’ve finally figured out my best setup – different to above.
I’ve written some notes on how to set Reaper and Maschine so that you can jam in the Maschine plugin without using “midi mode”.
This setup allows you to:
– record midi out from Maschine pads or Patterns/Song playback onto a Reaper track
– have multiple Groups being triggered from midi in arriving from multiple tracks in Reaper
– retain the Maschine 2 plug-in functionality
Instructions here:
https://docs.google.com/document/d/1TFj9fr3w4_j73BHFZAj5lp26r7eY6nWfb-Cu8PIK_Dw/edit?usp=sharing